3 Workflow Tips to Create Photorealistic Visualizations
/
Wednesday, 15 September 2021
/
Published in
Artwork, Exterior Visualization, Interior Visualization, Making Of, News, Posed 3D People, Products, Research & Development, Tutorials

This time, we had the opportunity to talk to Philip Moreton, 3D artist and architectural visualist, about his most used workflow tips for creating photorealistic visualizations and architectural renderings. For this interview, he also took his time to share amazing insights into several of his latest 3D projects.
We would like to thank Philip for taking his time to show us his tips and strategies around his projects and for sharing interesting insights into his daily workflows. Please enjoy his showcase and tips:
The “Béton Brut” and “Cubist” project – real world photorealistic visualizations
The first project Béton Brut was inspired by the project Tranquil House by Form/Kouichi Kimura Architects.

The second project, Cubist, was based on the original project Penthouse C by the renowned Architect Vincent Van Duysen. These two projects caught my eye due to their bold structures and brutalism aesthetic.

The initial aim of these two projects was to create some high-realism marketing images for Poliigon’s concrete and plaster assets. I then further used these projects as case studies for exploring different cinematic lighting scenarios.
With Béton Brut I decided I wanted to give the space a new location, embedding the building into nature and extending the rear construction to include both a pool area and underground garage. The project Cubist on the other hand I kept quite close to the original design but experimented with some unique compositions and lighting. As both of these projects were based on existing designs I spent some time gathering reference images from the projects on Architectural blogs and compiling them into a Pureref board.
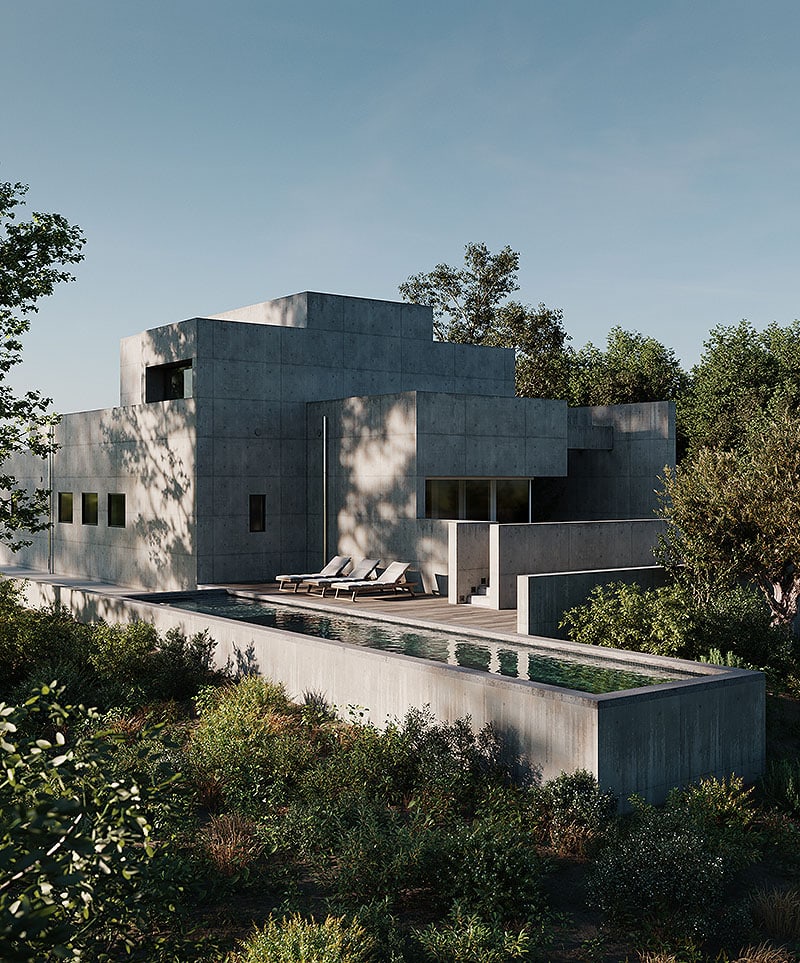
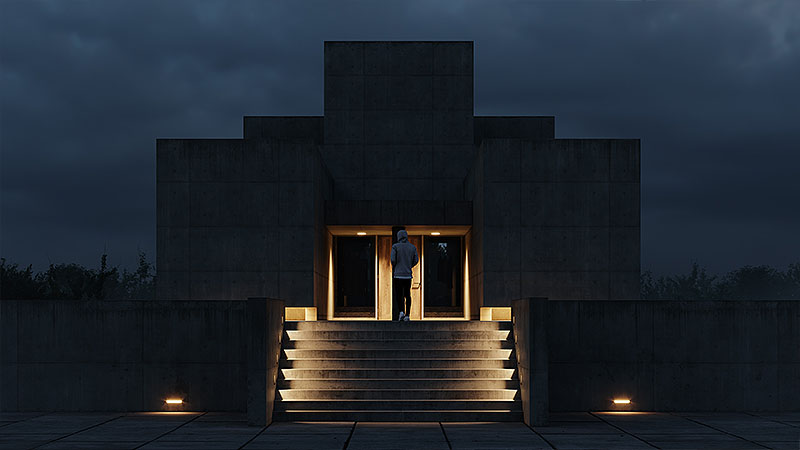
Béton Brut Exterior Pool Scene | Philip Moreton
Scene layout and planning for photorealistic visualizations
My typical approach although not always the most efficient is to model the complete architecture, which I did in both of these cases. This gives me a lot more flexibility for choosing compositions in 3D without having to go back and forth between modeling and defining compositions.
With my images I always try to include some out of focus foreground elements to help give depth and use light as a way of guiding the eyes of the viewer. I also try to add a transition of brightness values from the foreground, mid-ground, and background. The foreground being the darkest and the background the brightest. This also contributes to giving depth to the composition.
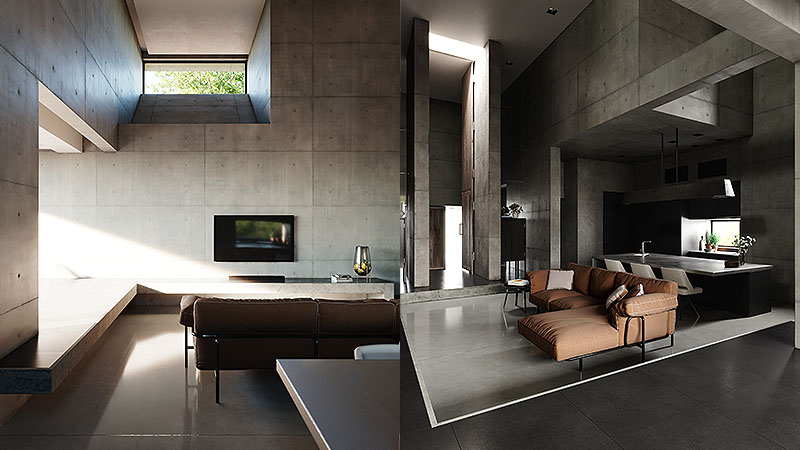
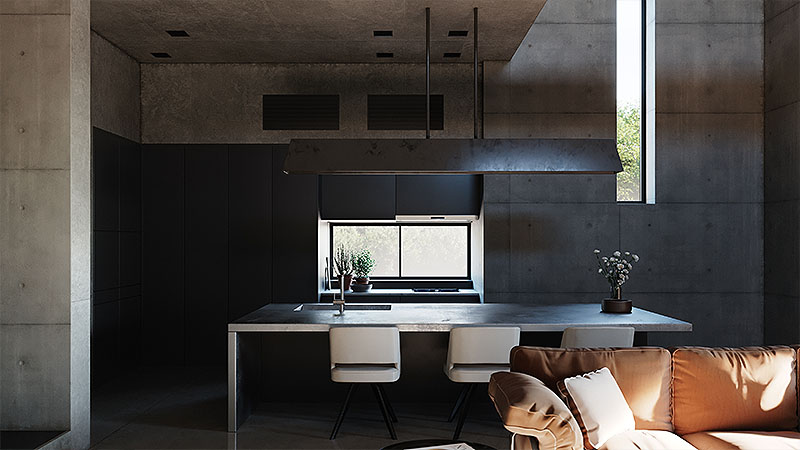
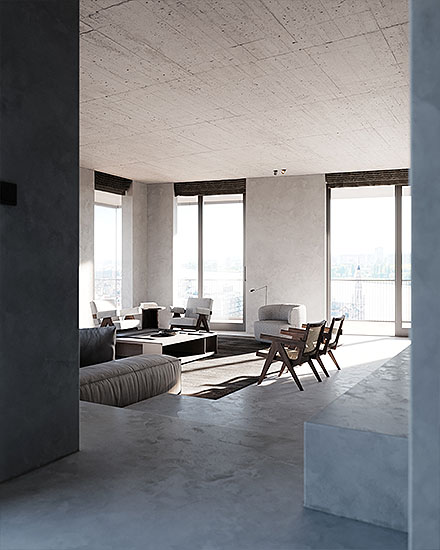
For interiors, I spend a lot of time choosing the right furniture and decorations for a project. I think it’s also important to move furniture and decorations around for each composition in the same way an Interior stylist would. I think this is an undervalued step in 3D visualization that can really help make each composition stronger.
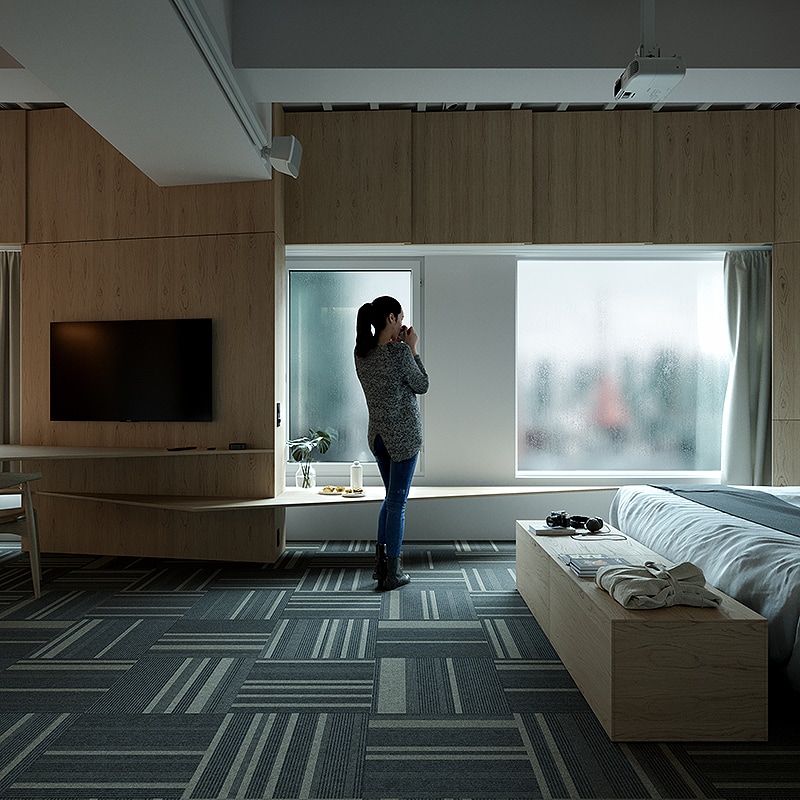
Interior decoration example | Philip Moreton
Choosing the right toolset to create believable renderings
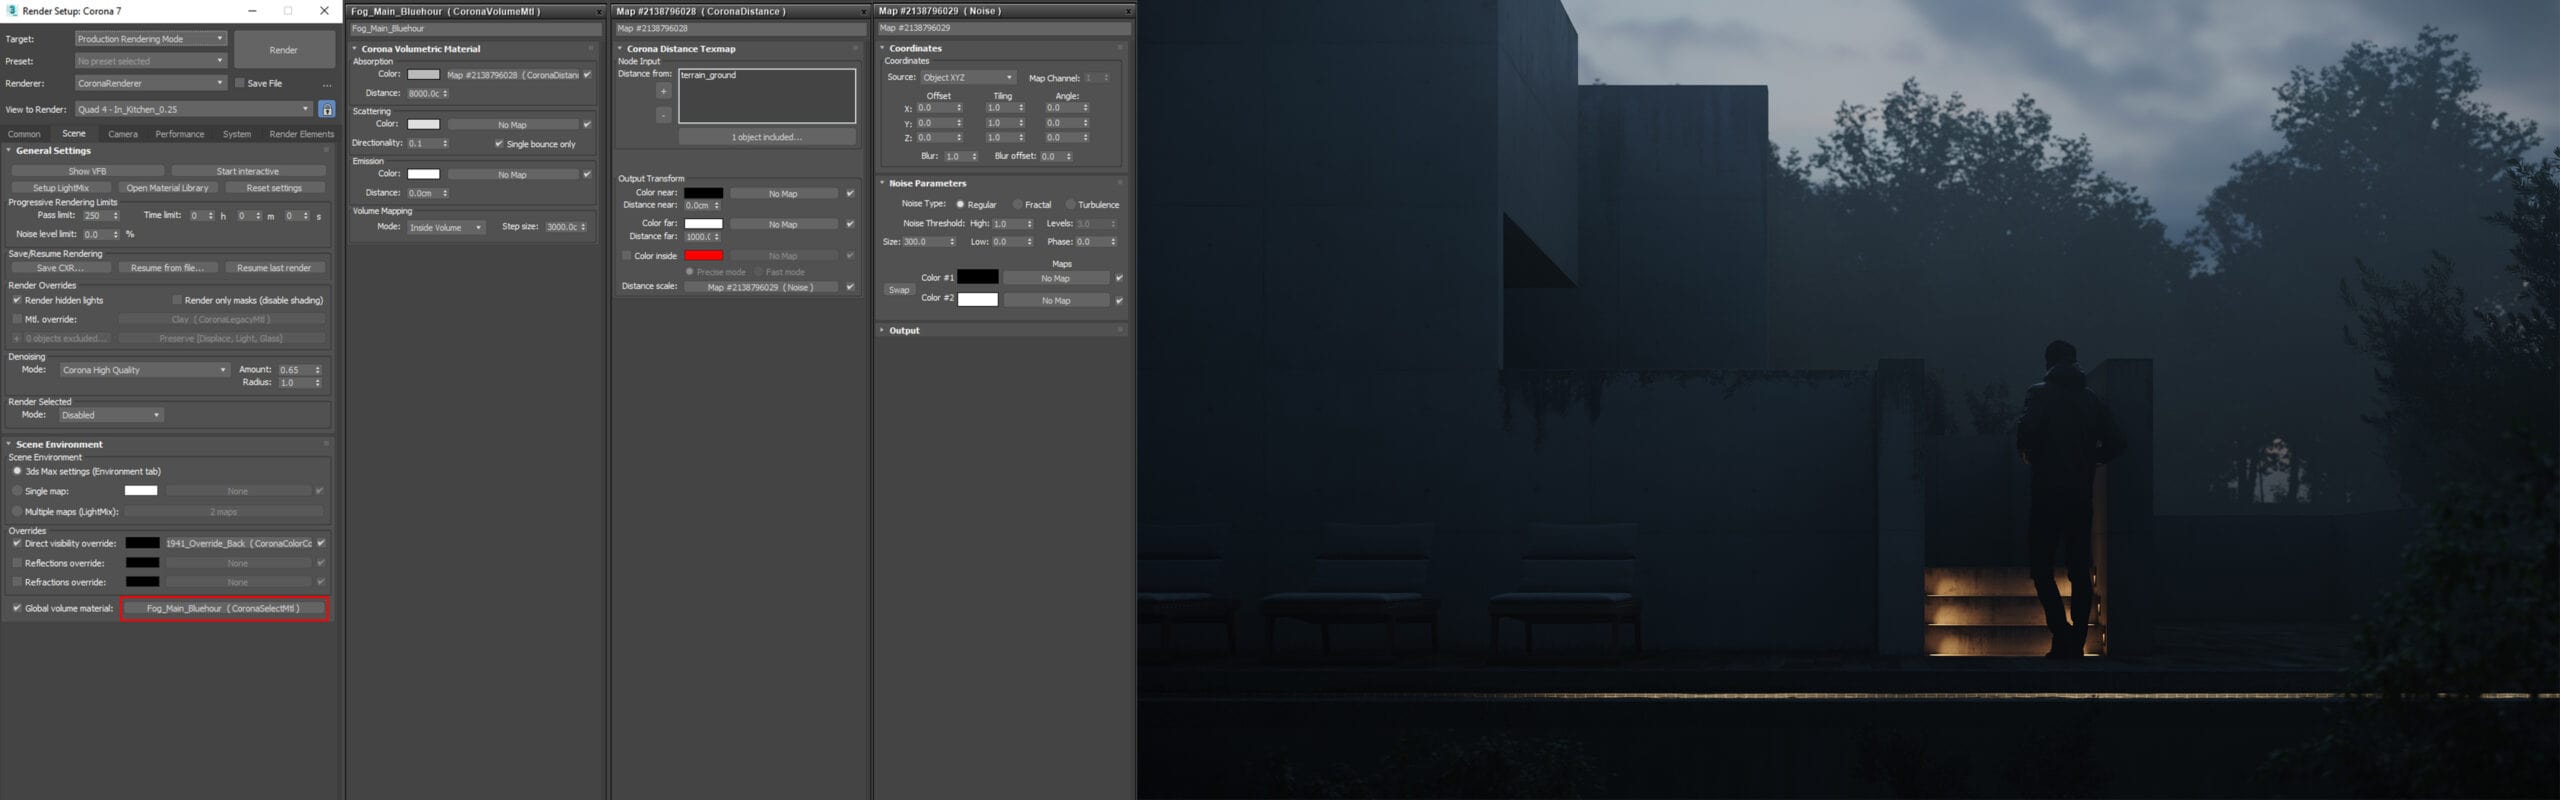
For these two projects I used 3ds Max, Corona Renderer, Forestpack, Marvelous Designer, and Photoshop. I especially enjoy using Corona Renderer for its ease of use and its many features that help aid with realism. I find Corona Lightmix a very powerful tool and often use the function of rendering multiple HDRI environments simultaneously. For cinematic images, I love turning on volumetric fog, which can really help enhance the atmosphere of images.
Top 3 Tips to create photorealistic visualizations
1) Get closer to photorealism
In regards to realism, go the extra mile with modeling and texturing. For both upper shown projects I modeled the walls and floor as one continuous block. This was quite time-consuming to model but it allowed me to add some additional details such as a chamfer to the edges and some subtle dirt using Corona’s Ambient Occlusion map to all of the crevices.
For some additional realism with the Béton Brut project I unwrapped the exterior facades and created some dirt and leaking textures in Photoshop, which I overlaid over the base concrete on different UW channels. For the wood cupboards in the Cubist project, I used a floor generator to create individual planks and added a chamfer and noise modifiers to each plank to further enhance the realism. All these subtle details help push the realism.
2) Learn to use PBR workflows
I recommend using the PBR workflow for materials not only because this is becoming the standard in the industry but also because it helps ensure that all materials stay consistent even if you change the lighting. This is also helpful if you want to reuse the same materials in future projects.

3) Try to reduce retouch processes
Thirdly I try to set up everything correctly within the raw render and try not to depend on post-production too heavily. I find myself needing Photoshop less and less and I tend to do a lot of the color grading using Corona Renderer’s built-in tone mapping parameters.

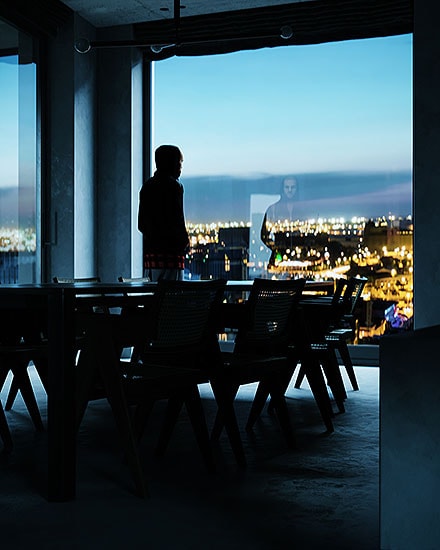
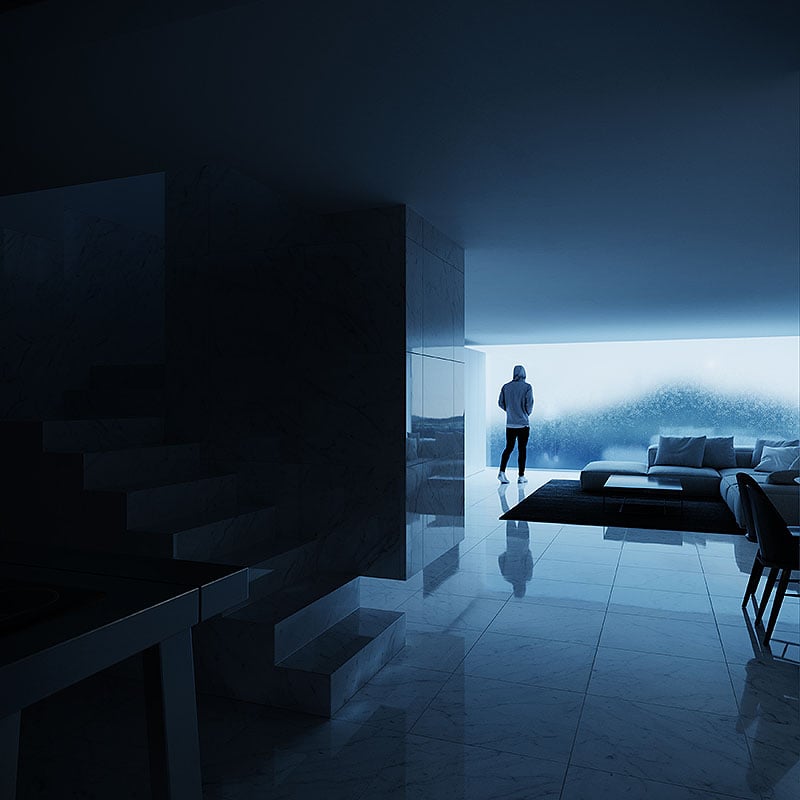
Using 3D People to create more photorealistic visualizations
I’ve always struggled using 2D people within renders. No matter how much tweaking I did in post I found it really hard to get the 2D people to sit seamlessly in an image. With 3D People, there is no issue in that regard and a lot of time is saved.
I also like to experiment with different lighting options and creating cinematic images with volumetric fog, using 3D people is ideal for that workflow. There is no need to tweak the lighting of the character every time you change the light. Also when using Volumetric Fog the character will sit seamlessly within the fog, which is especially hard to achieve with 2D people in Photoshop.

Exterior Scene with 3D People Model Example | Philip Moreton
“It’s always a pleasure to use Renderpeople assets within projects and I’m consistently impressed by their quality.”
Huge time saver for 3D projects
Organization and optimization are key when working with large-scale projects. I have all my vegetation models pre-converted to Corona Proxies in my 3D library. That way I can just drag and drop them straight into a scene without having to convert them every time. I also use Forestpack to scatter all vegetation, which further helps optimize the scene.
Finally, I organize everything into layers that can be turned on and off. All these points help give a fluid performance whilst working with large scenes like the Béton Brut project, where I had the exterior/interior geometry and a large number of forest pack scatters all integrated into one scene.
About Philip Moreton
![]()
Logo of Philip Moreton
Behance | Instagram | LinkedIn
Philip Moreton is a 3D Artist specializing in photorealistic Architectural and Product visualisations. He has worked over 10 years in the Archviz industry and enjoys the challenge of continuously learning new tools and adapting his workflow with the aim of creating emotive images.


