How to Import 4D People into 3ds Max

If you are looking for even more realistic animated people models for your scenes. This is for you! 4D People are captured by state-of-the-art volumetric capture technology. They are, so to speak, moving 3D scans. This allows us to capture every detail of our actors. The result is a highly realistic 4D model that can be used for any kind of animation.
All you need to follow this tutorial is a 3ds max scene of your choice our free 4D People model Aliyah. Download our freebie and you are ready to go.

Importing 4D people model into 3ds Max is only a matter of a few clicks. In this article, we will outline the necessary steps for importing a 4D people model into 3ds Max. Here’s how:
Step 1 – Open up the Renderpeople 4D People Zip-Archive
Our 4D People models for 3ds max include several max project files for Corona Renderer, Native, Octane Render, and V-Ray. You’ll also find a performance 2K version if you want to use a few 4D People models at once in your scene. For close-up models, we recommend using the 4K version. Next to the project files, you’ll also find a 4D People alembic file. This alembic file contains the geometry stream for the Renderpeople model. In addition to the geometry files, you’ll also find two separate texture folders, including all needed textures.

Step 2 – Copy Files into Your Project Folder
Open up your project folder. Now select the 4D People 3ds max file, the alembic file, and the tex folder and copy those into your project folder. Make sure to select either the 2K geometry file and 2K texture folder or the 4K version if you need the higher quality. For this tutorial, we will use the VRay version of the model. However, the import process is identical for all other renderers. It is important to copy all needed files because 3ds max will look for those specific file names when merging the model into the scene.
Step 3 – Check your 3ds Max Scene Settings
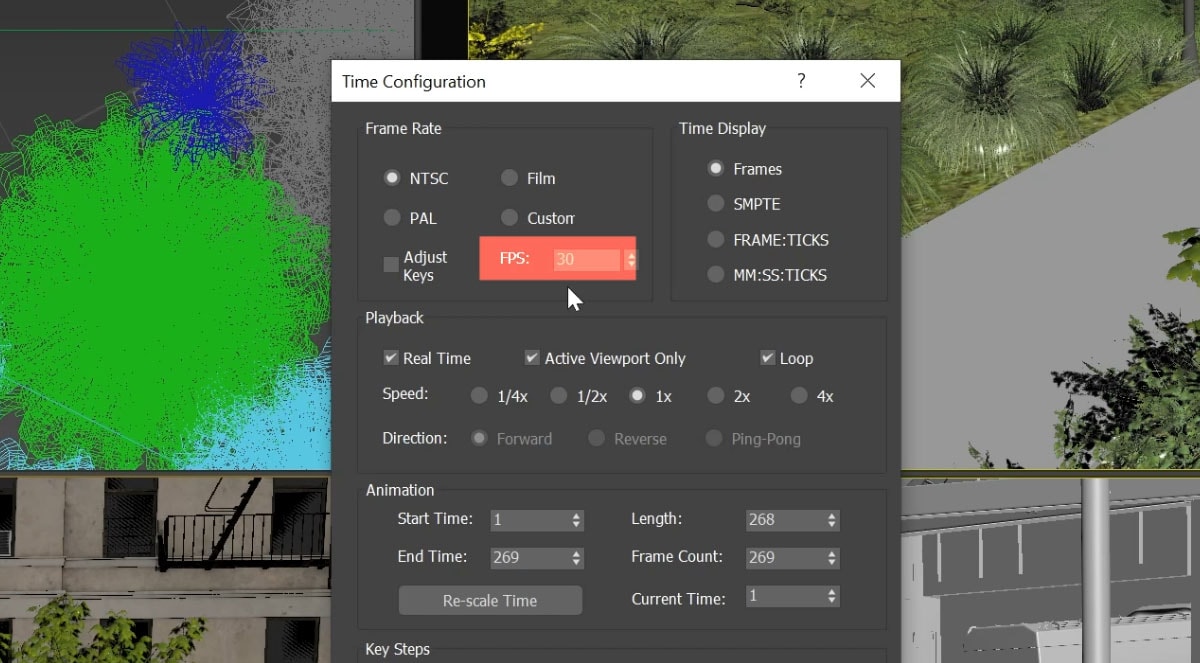
Once everything is copied into your project folder, open your 3ds max project. For this tutorial, we will use this park scene and place our free model right in the center of this walkway. Before importing the model, we need to check if our scene is set to the correct framerate. Open up the time configuration window and set the framerate to 30 frames per second if needed. All of our 4D People were captured volumetrically at 30fps. This can cause rendering issues if the scenes framerate does not match.

Step 4 – Merging the 4D People Model
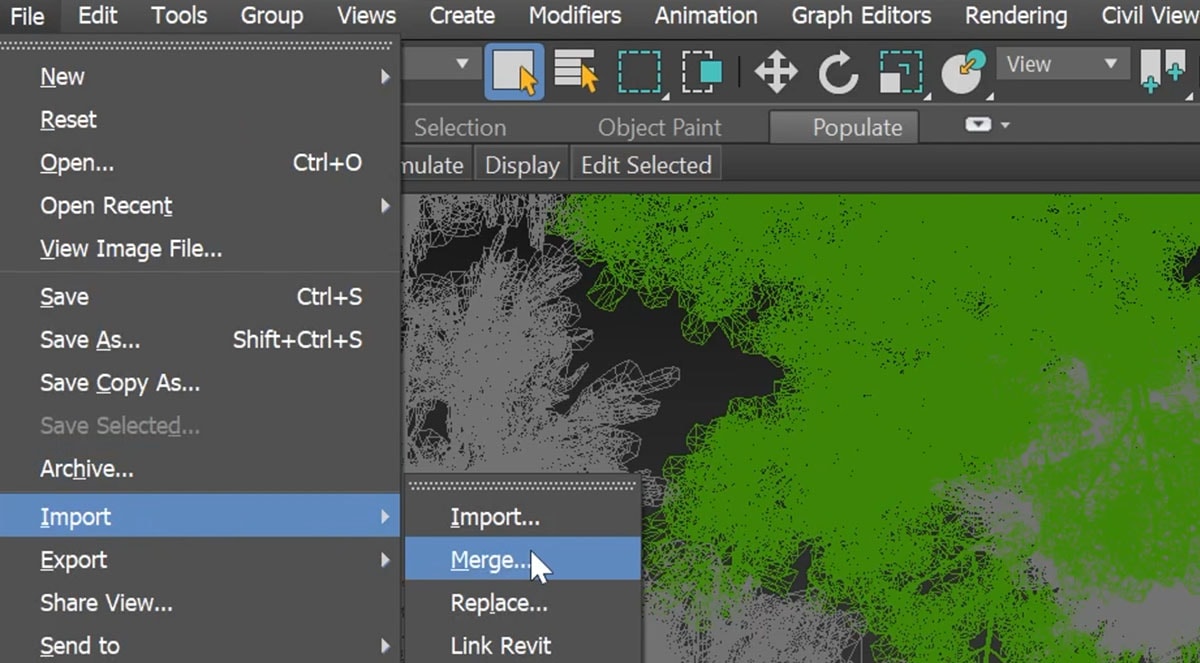
To merge the 4D People model into your scene, go to the files menu, click import, and click on merge. Now search for your project folder, select the 4D People 3ds max file and click “open”. In the merge window, select the 4D People object and hit ok. Now the model is loaded into your scene. You can move and rotate your models in your scene until you are happy with the result.

Step 5 – Check your Imported 4D People Model
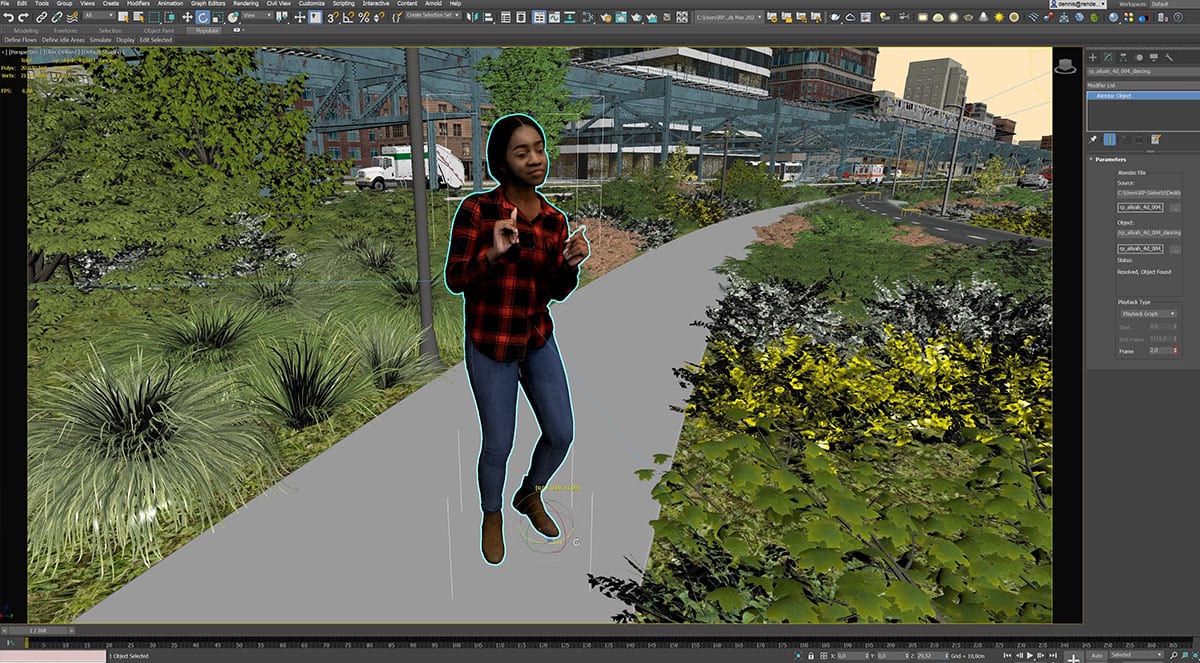
The geometry and texture stream will load automatically and the model is now ready to go. If you want to check if the model works properly, you can select the 4D People alembic model. In the Alembic file, you can see that the objects have been found successfully and everything is loaded as it should. You can also check the imported 4D People material in the material editor. Keep in mind that our 4D People use an .IFL texture stream instead of a static texture. Now that we have set the right camera angle, we can start the rendering.

Step 6 – Render!
If you want to import more models, simply repeat this process with another model, but keep in mind that you need to copy all needed files before you merge a different 4D People model into your scene. Have fun using our freebie model in your projects and let us know if you like our models. We cannot wait to see your results.

If you want you would like to have a more detailed look at each step, have a look at your tutorial video on how to import 4D people into 3ds max:
You are currently viewing a placeholder content from Default. To access the actual content, click the button below. Please note that doing so will share data with third-party providers.


