How to Use Raytracing and Denoiser in Rhino 7

More and more 3D applications are implementing raytracing and other technologies into their renderers. This enables fast and efficient implementation of complex lighting scenes with realistic illumination. In Rhino 6, this was already done by adding the new raytrace mode. This was a great way to achieve a good lighting, but a very high sample count was needed to get a usable result. Now with Rhino 7, exclusive denoiser packages have been implemented for the first time as an online package, with which it is now possible to denoise and optimize the raytrace image directly in the Rhino engine.
Step 1 – Set up your visualization scene in Rhino 7
The good thing about raytracing in Rhino 7 is that now it’s very easy to come up with quick render results using existing scenes and objects. For most scenes, the basic settings will create good results and are perfect for getting a good starting point. Just like other path or raytracing renderers like Blender Cycles or KeyShot a single rendering takes many passes until the overall noise level gets acceptable low. With Raytracing in combination with Denoisers in Rhino 7 you can get viable results in less time whilst getting a cleaner image at the same time.
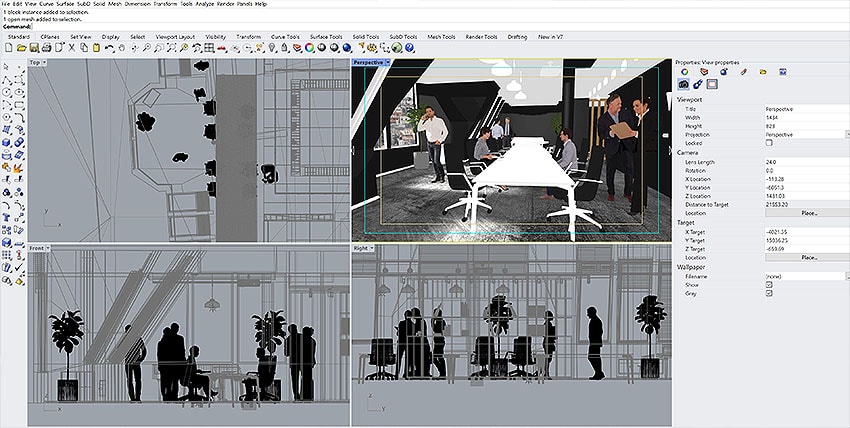
For our quick example we used this interior office scene, which will be our test scene.
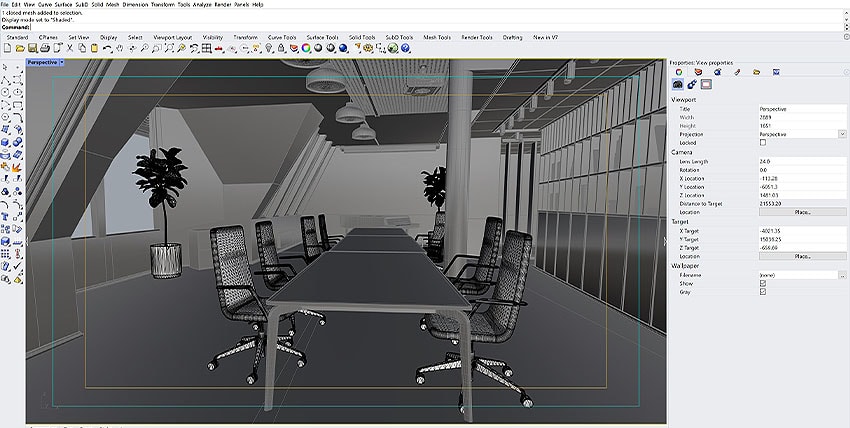
Rhino 7 Office Visualization Viewport
Step 2 – Activate Raytracing and Denoiser in Rhino 7
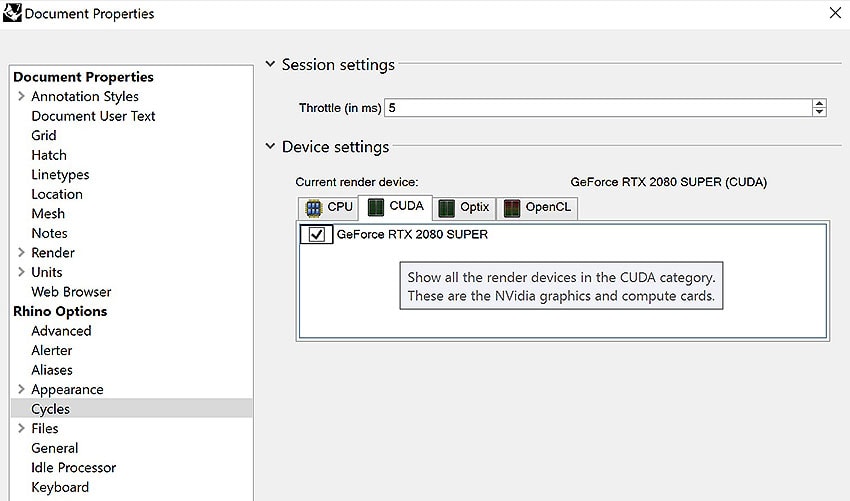
Depending on your workstation, it is recommended to select your graphics card for rendering raytracing first, since CUDA cores are much faster than processor cores in the case of raytracing.
You can check your Raytrace Settings under: File > Properties > Rhino Options > Cycles
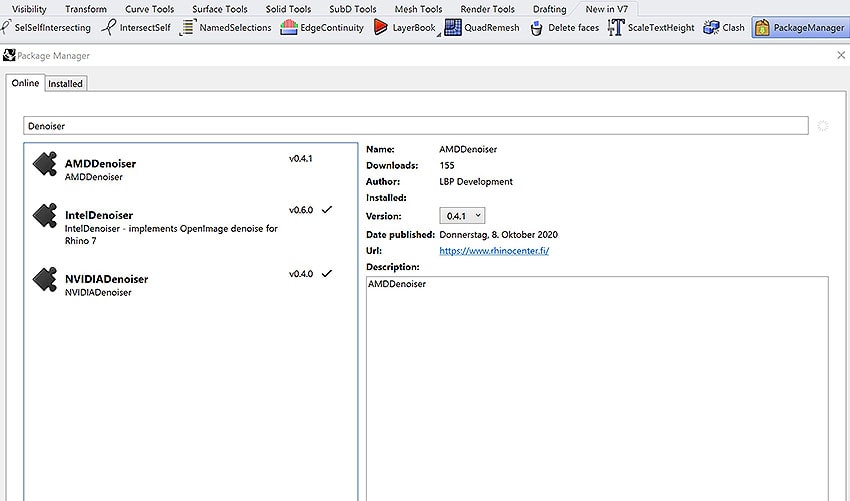
If you haven’t installed the Denoiser packages yet, you can find them under the Rhino PackageManager in the “New Features” Tab. Enter “Denoiser” into the search box and select one Denoiser of your choice. For this demonstration we will try out the performance of the IntelDenoiser. All available Denoisers create a very similar result. Depending on your graphics card you might get more efficient results with NVIDIAs or AMDs Denoisers.
IMPORTANT: After installing the Package you need to restart your Rhino Scene to activate the Denoiser after Rendering.
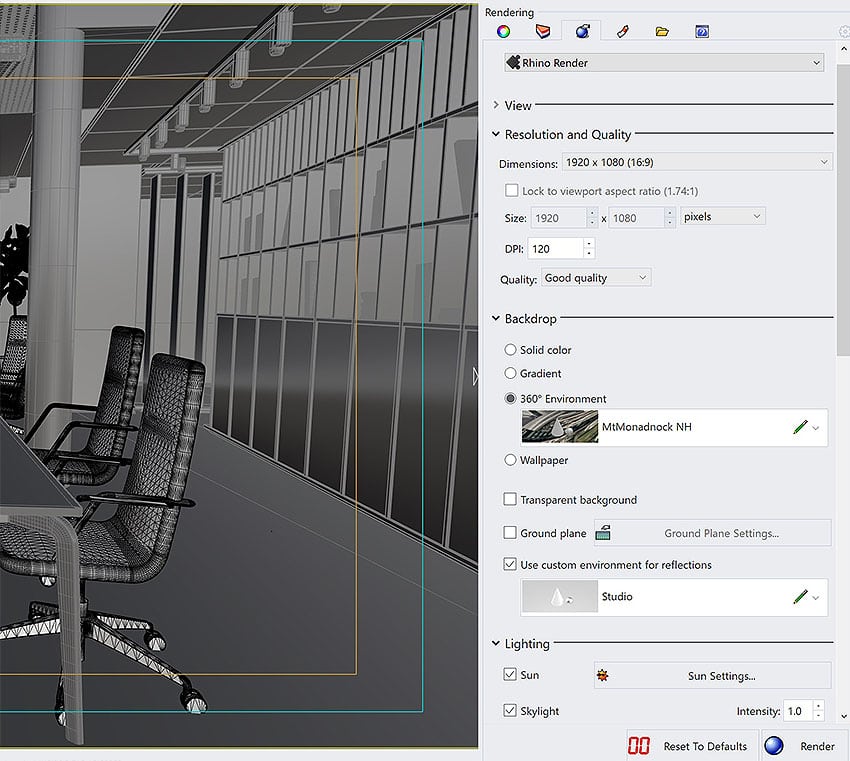
For this demo we quickly dive into the rendering tab to setup our scene. We want the scene to mostly use the available sun and skylight to illuminate our scene.
Make sure to have a look at the following settings:
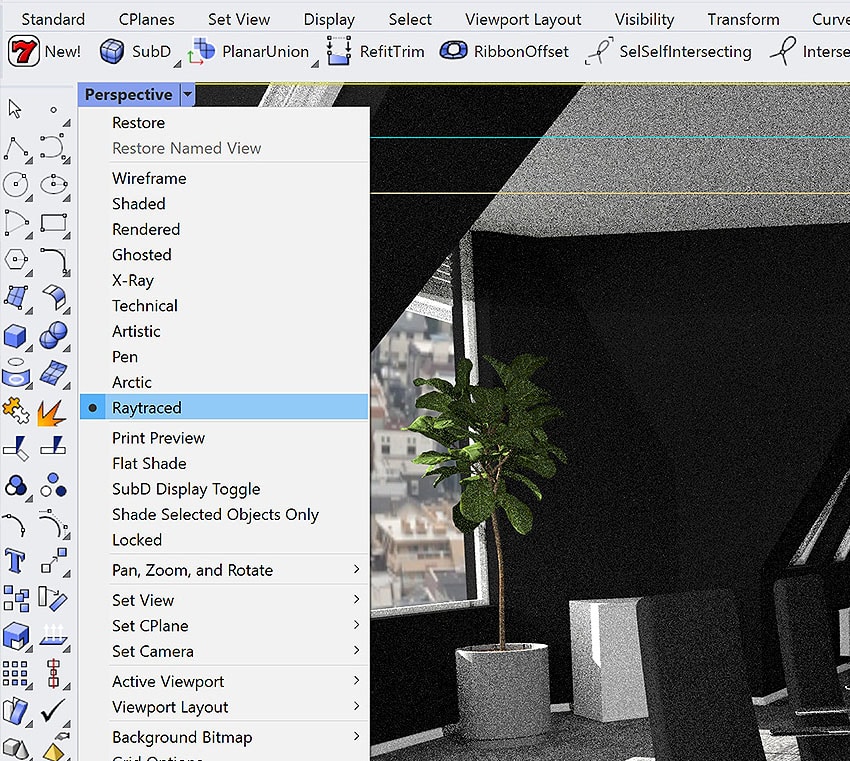
Now that everything is prepared we can turn on the viewport realtime raytracing preview to get an idea how the scene looks with raytracing and our sun and skylight enabled. You can enable the viewport raytracing in the top-left corner of your viewport. Click on the small arrow and toggle the “Raytraced” option.
Now that our general settings are set this interior scene begins to look a bit empty we might as well add some actor to the scene. To place a few characters to the scene and to give the raytracer more objects to work with we import Renderpeople 3D People and have a look how they look with raytracing. Using 3D People models in Rhino adds more depth to your scenes and help to create more convincing scenes in Rhino 3D.
Step 3 – Start Raytracing and Denoising in Rhino 7
If you are happy with the overall placement of your objects in the viewport, head back into the Rendering Tab and hit the “RENDER”-Button. Your image will then be rendered with your currently assigned processor or GPU.
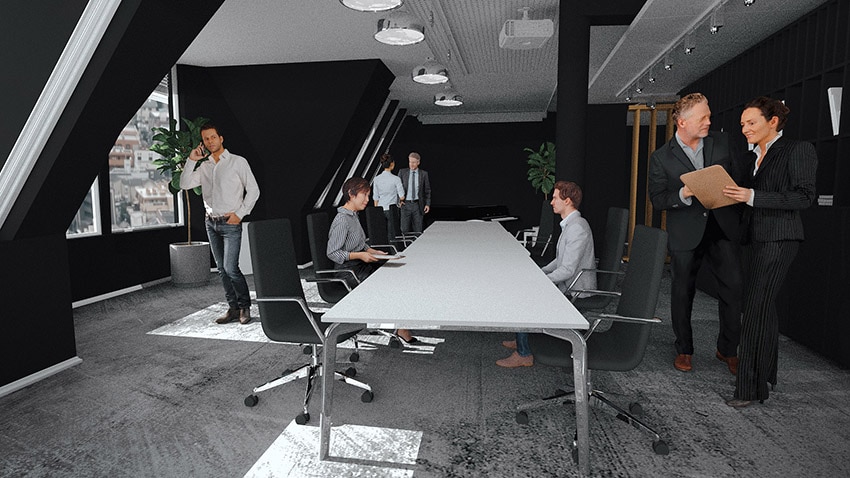
As you can see the image contains quite a lot of noise especially in darker areas of the image. We kept the overall lighting a bit darker than usual to get the noise more pronounced for this showcase. For your own projects you might want to get a more even lighting and also a better overall exposure.
To get rid of most noise artifacts and to clean up the image it is now time to activate the Denoise component. In the “Post Effects” Tab you can activate the Denoiser-Component of your Choice by adding it with the “+”-Button Menu. Now you can see the Denoiser in the Post Effects Options. Simply activate it by ticking the box. For this example we rendered our image with less samples as you normally would and used the IntelDenoiser denoise our image.
Render Comparison – Left: Raytrace Rendering | Right: Raytrace Rendering with active Denoiser


Most of the noise on the ceiling and walls has been removed and the image is very clean at clance. But there is also one thing you need to keep in mind when working with the Denoisers. The Denoiser removes noise and artifacts after a pre-calculation based on the visual content of the image. In addition to raytracing noise, this also retouches fine details in textures you might want to keep.
Render Comparison – Left: Raytrace Rendering | Right: Raytrace Rendering with active Denoiser

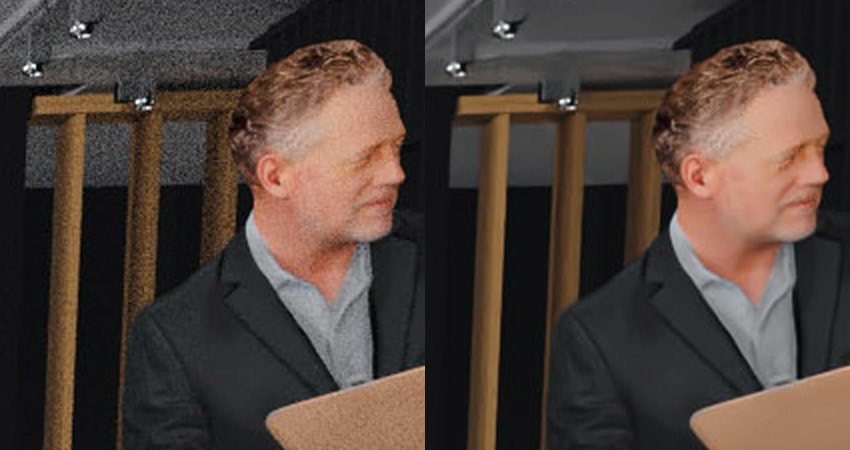
For example, fine details of jeans and patterns in shirts or tops are recognized as “artifacts” and removed by the Rhino Denoiser. Keep that in mind when working with denoisers. One way around this is to save the image once with and once without the denoiser. As a result, you’ll be able to bring out fine details like rough surfaces or material noise in programs like Photoshop.
Result – Final Raytraced and Denoised Rendering

Rhino 7 Raytracing and Denoiser Business Visualization
Of course you can use all the other great post processing effects to enhance your Renderings even more. The flexibility to turn off any post-pro component after the initial rendering is a great way to get more creative freedom. If you want to test the new raytracing and denoising for yourself, check out the demo version of Rhino 7 and feel free to use our 3 Renderpeople free 3D People for Rhino to test how the denoiser works.
Thanks for reading our small tutorial on how to use the integrated Raytracing and Denoiser in Rhino 7. If you’ve found this article useful, please let us know and follow us on our social media channels.


