Creating 3D Mannequins for Retail and Shopping Visualizations
/
Wednesday, 21 March 2018
/
Published in
Exterior Visualization, Interior Visualization, Posed 3D People, Tutorials

Using Renderpeople 3D People to create custom Mannequins
Why do mannequins make (digital) stores look more attractive to customers? They attract customers, show the latest collections at a glimpse, and make for an appealing presentation. But not only that: mannequins are also an important and proven marketing tool. Giving customers a sense of security and increasing buying behavior. They are a kind of tool to connect the customer and the product, which also applies to architectural visualizations of stores and digital shopping malls.
Using Renderpeople 3D People is the best way to save time in architectural visualization projects. 3D People help to deliver a direct sense of scale in your projects from any perspective. While you use many different posed or rigged human 3D models for your shopping mall and retail scenes, did you ever think about the assets you use behind the shopping windows? So, we will show you a quick and easy way to get even more value out of your Renderpeople library.
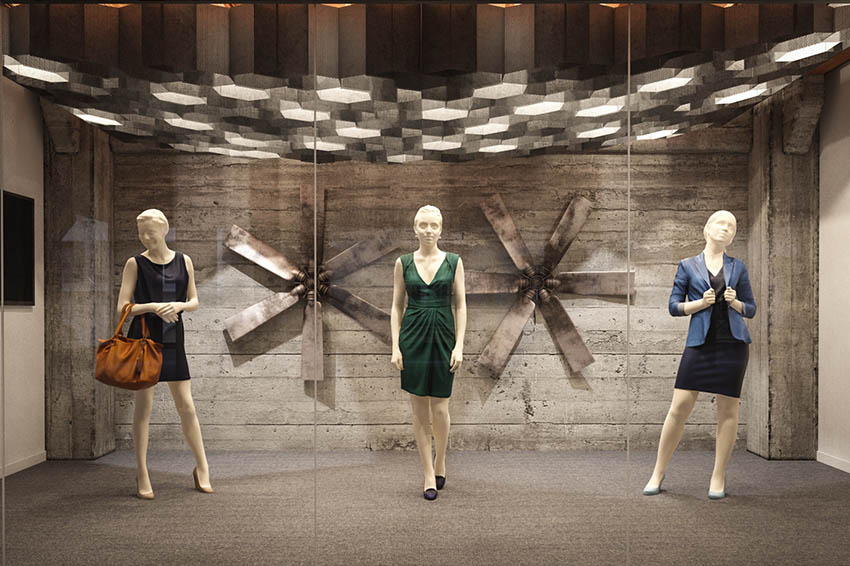
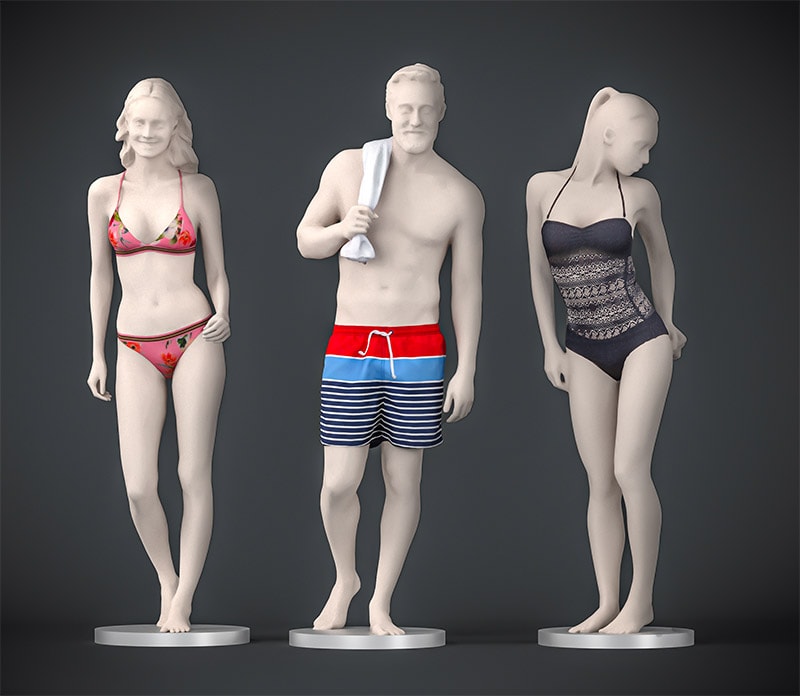 Renderpeople 3D People as mannequins.
Using Renderpeople 3D People to create custom Mannequins
As the title of this blog post already unveiled, this article is about creating 3D mannequins – and the best thing is, you can use nearly every model you already own to create your very own shopping mall display dummies or mannequins.
All you need to start with is a Renderpeople model and a 3D scene of your choice.
“Important note:” This technique will not work with any formats that come with embedded textures.
To test the workflow, we need to import one of the Renderpeople models we want to modify into any scene.
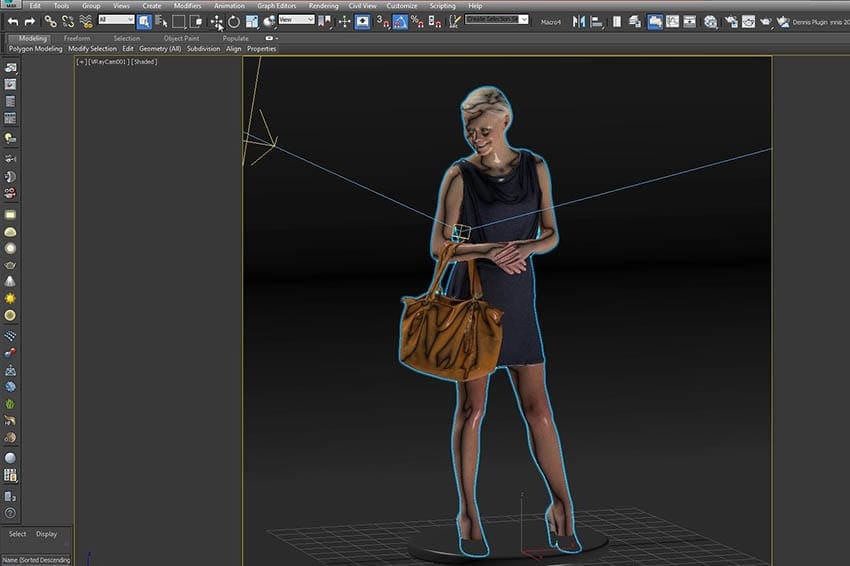 Imported Model Stephanie Posed 005 Within 3ds Max Viewport
It is very important to move the “tex”-folder into your project folder so that all material’s textures are automatically being found and linked. Now if the model shows up with all textures properly loaded, it´s time to modify the diffuse map in order to create a nice-looking mannequin.
Editing the included Diffuse Map:
Open up the included “tex”-folder inside your project folder and import the _dif.jpg map of your Renderpeople model into any advanced photo editing software, like Adobe Photoshop.
When your texture has been loaded, it´s time to create a new layer, which will contain the base color of our new mannequin model. Create a new layer and fill it with any color. In this case, I will use a very bright yellow to create a plastic-like look.
Finally, activate masking mode – you should now see that the white masking channel has been activated next to your color layer.
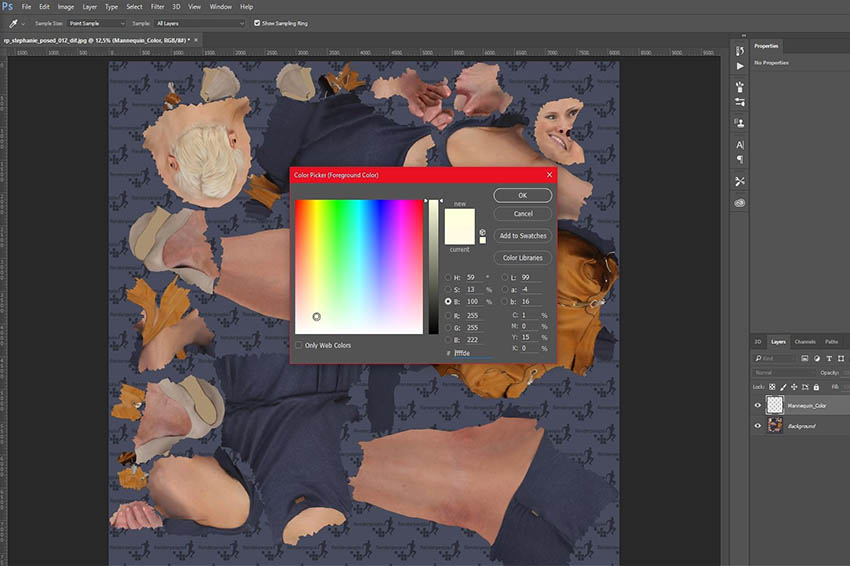 _dif.jpg loaded into Adobe Photoshop CC
When your layer is filled with color, we now need to define the area we want to colorize. Renderpeople models come with many different specular masks which we can use to limit the colorization to the area of the model’s skin and hair. Import the _skin01.tif and _hair01.tif mask into the same document so that all maps align perfectly. This is very important, as otherwise the masking will not work correctly and create artifacts in the renderings. Now, in the layers tab, move those new maps so that they are placed above every other map. Select the top mask and set its blend mode to “linear dodge” or “add”. Now, those two maps will merge the white areas with each other to create a perfectly added skin and hair mask.
Merge both maps with each other and select the whole document [CTRL+A]. Now copy the black and white information to use them as a mask for our mannequin color layer [CTRL+C]
Select the mannequin color layer, which we had created earlier, and switch to the channel view. There you should see the empty mask slot. Select this mask channel and paste your black and white map [CTRL+V].
 the combined skin and hair mask has been added to the mask channel of the colormap
Now, you can see that the color fits perfectly into the UV-Cutout and was limited to the area of the hair and skin.
Switch into the layer tab and check if the color layer perfectly colorized the diffuse texture as planned.
Retaining the data structure:
If everything looks good, simply save this newly created mannequin diffuse map and overwrite the existing _dif.jpg map inside your tex folder (creating a backup of your original diffuse map is highly recommended!). Because this new map shares the same name as the original diffuse map, the material editor of your 3D application will naturally pick this new texture.
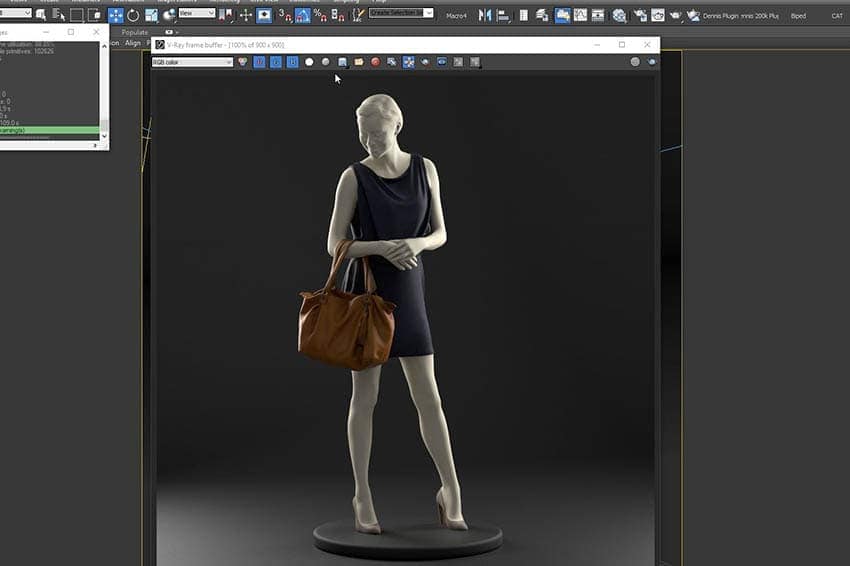 Rendered preview of the model with edited diffuse map
Check the viewport to see if the texture has been updated. All skin and hair parts are now colorized and ready to render.
Render your model. Looks great, doesn’t it? Now, you can use your Renderpeople model as a mannequin in your shopping windows and retail visualizations. To revert your model back to normal, simply swap out your newly created mannequin diffuse with the original diffuse texture. Take care of the naming though, so that the material will automatically recognize it.
It’s great to get even more value out of your Renderpeople library and to get stunning display dummies for your shopping windows. 3D mannequins will make your shop windows more realistic and in connection with Renderpeople 3D people even more fitting and sophisticated.
Also, if you want a more detailed step-by-step tutorial, please feel free to have a look at our video-tutorial on how to create your very own 3D mannequins:
Renderpeople Tutorial – Creating 3D Mannequins
You are currently viewing a placeholder content from Default. To access the actual content, click the button below. Please note that doing so will share data with third-party providers.


