How to Change Colors of Renderpeople 3D Models in 3ds Max and Cinema 4D

When rendering huge scenes with many different 3D characters there is always a need of diversity and variation. By using Renderpeople 3D models you´ll get the freedom of creating hundreds of differently styled characters with a few clicks and without the need of adding further 3D People to your scenes. With the capabilities of 3ds Max´s and
Cinema 4D´s material editor and the included Renderpeople texture masks you get the option to define and manipulate the colors of your 3D People until they fit perfectly into your personal scene- and renderstyle.
Most of the times you will not use the same model over and over again in your scenes. To create more variation in your renders, changing the colors of the selected model will result in a completely new look. This way you can easily use your 3D People multiple times without obviously showing that you used the same model repeatedly.
Changing colors in 3ds Max
Changing the colors of Renderpeople models in 3ds Max is very easy and with a little bit of practice, the results will look outstanding.
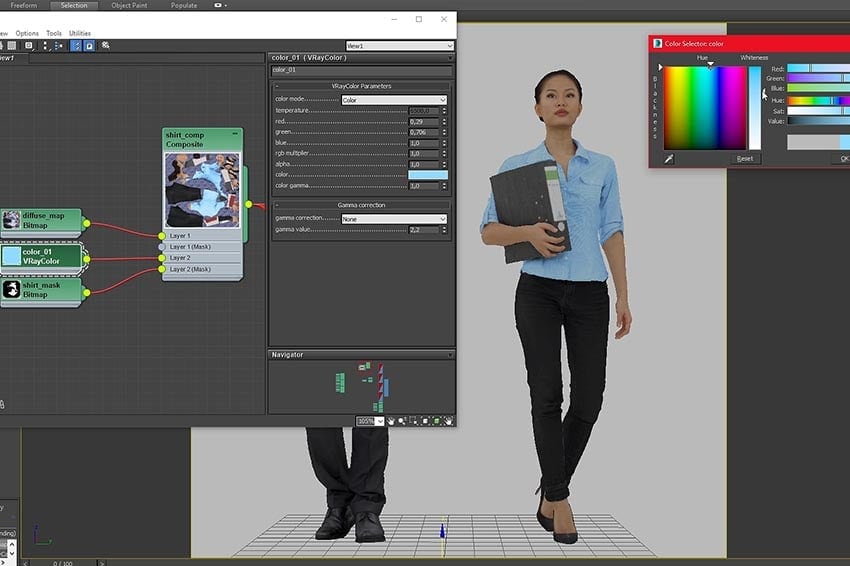
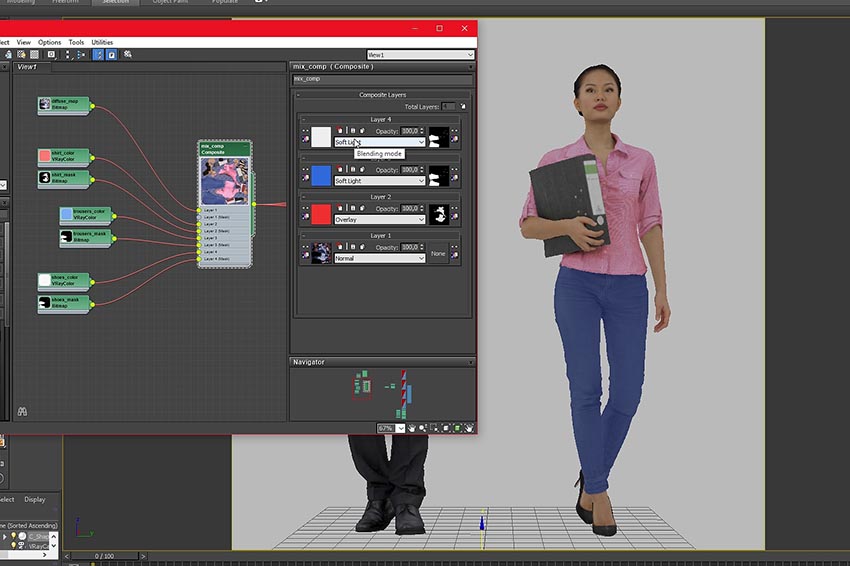
The goal that we want to achieve with changing the colors is to modify the already included diffuse map with a non-destructive method. In the material editor, you can achieve very good effects with the 3ds Max composite map. Use the composite map to combine a color of your choice with the diffuse map and directly mask out the area you want to adjust with the included alpha masks.

By using the ‘Overlay’ blend mode you can easily add some color to already bright texture areas without losing any details. Also, you can adjust multiple areas of the model by combining different color and alpha masks. This way you can change the color of the clothing, hair or skin of the model and keep all the flexibility you need to change the colors later on if needed.

For more information, check out our tutorial on how to change colors of Renderpeople models in 3ds Max:
Renderpeople Tutorial – Changing Colors of Renderpeople Models in 3ds Max
You are currently viewing a placeholder content from Default. To access the actual content, click the button below. Please note that doing so will share data with third-party providers.
Changing colors in Cinema 4D
In Cinema 4D you also adjust the look of your Renderpeople models with only a few clicks.
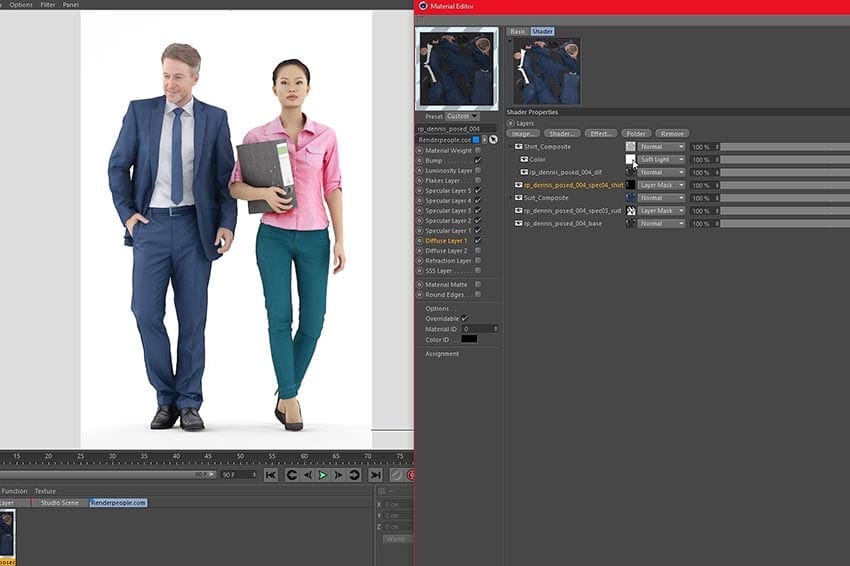
You need to replace the already connected filter-shader with a layer-map. The layer-map can handle multiple textures and composite them to manipulate the diffuse texture anyway you like. Add the diffuse map, which is included in the tex folder into the layer setup, with pressing the ‘image’-button. Creating a folder and adding another diffuse map is an important step for this method because you can stack many adjustment folders to edit multiple parts of your model. After both diffuse maps are arranged, you need to add a color map which will later define the color of the area you want to adjust.

Use the ‘overlay’ blend mode, to slightly add a color to the shirt without destroying any details. The color is overlaid over the whole model, so you now need to define the specific area you want to colorize.
The only thing you need to do is to add the mask to the layer setup. Import the mask, place it under the new folder and set the blend mode to ‘Layer Mask’. By adding this layer mask, the color will only affect the area which appears white on the mask.
Changing the colors will add a whole new level of flexibility to Renderpeople models and will help you to improve the overall look of your renders.
For more information, check out our tutorial on how to change colors of Renderpeople models in Cinema 4D:
Renderpeople Tutorial – Changing Colors of Renderpeople Models in Cinema 4D
You are currently viewing a placeholder content from Default. To access the actual content, click the button below. Please note that doing so will share data with third-party providers.


