 English
  Deutsch
  Español
  Français
  日本語
日本語 How to Import Renderpeople 3D Models into your 3ds Max and Cinema 4D Projects

Most of the times, when handling large sets of assets from different sources, it becomes more and more challenging to find the ideal workflow to merge those files into your personal projects.
With the capabilities of 3ds Max´s and Cinema 4D´s import options and the pre-built material setups, importing and placing your Renderpeople 3D People is very easy.
Simply load the models of your choice into your projects, without the need of re-linking or re-adjusting the material paths or specific material settings. Our 3D People are ready to render.
Merging Renderpeople 3D People into 3ds Max
There are only a few things you need to keep in mind in order to make your merging process as efficient as possible.
Our 3ds Max packages include two obj files with 100k and 30k polygon resolution and separate 3ds Max files for different renderers like Corona, the Native 3ds Max Renderer, Octane or V-Ray 3.
In addition to that, you´ll also find the tex folder with all needed textures in it. Before you merge the models into the scene it is important to copy some of the needed files into the project folder.
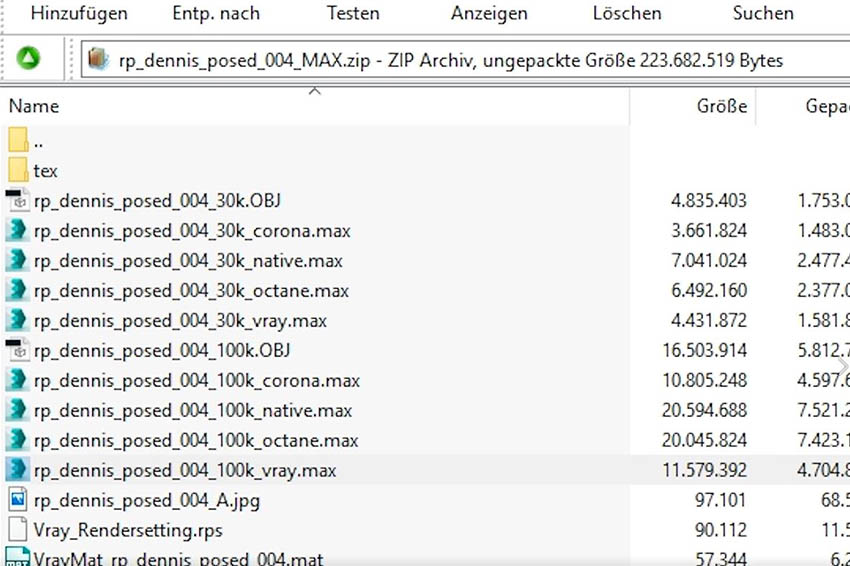
The Renderpeople materials were created with relative paths, so the included textures will be linked automatically if the “tex”-folder is placed in the project folder.
Copy the “tex”-folder and the Renderpeople 3ds Max file into your project folder.
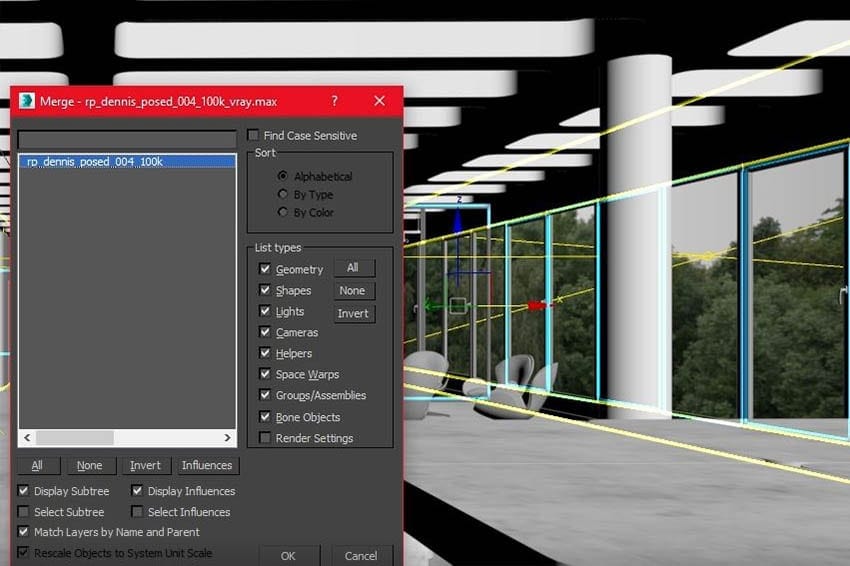
In the main menu of 3ds Max, use the import>merge option, to import the new model with all needed materials into the scene. Now select the model you copied into the project folder and press ok. Now you can see that the model appears in the center of your scene with all needed materials and textures. Move and rotate to model until you´re happy with the overall look.
After you have positioned your model in your scene, you can also edit the material of the model in the material editor. For further information on this, see this blog post.
If you want to import more models, simply repeat the process with another model, but keep in mind that you need to copy all needed files before you merge a different model into your scene.

For more information, check out our tutorial on how to import Renderpeople models into 3ds Max:
Renderpeople Tutorial – Importing Renderpeople Models into 3ds Max
You are currently viewing a placeholder content from Default. To access the actual content, click the button below. Please note that doing so will share data with third-party providers.
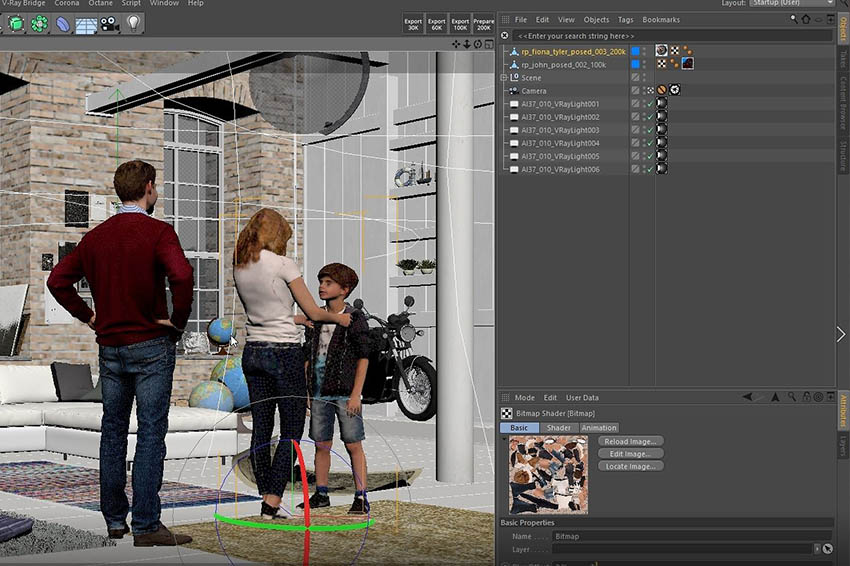
Merging Renderpeople 3D People into Cinema 4D
Just like our 3ds Max packages, our Cinema 4D packages include two obj files with 100k and 30k polygon resolution and seperate C4D files for different renderers like Corona, the Native physical Renderer, Octane and V-RayForCinema4D.
In addition to that, you´ll also find the tex folder, with all needed textures in it.
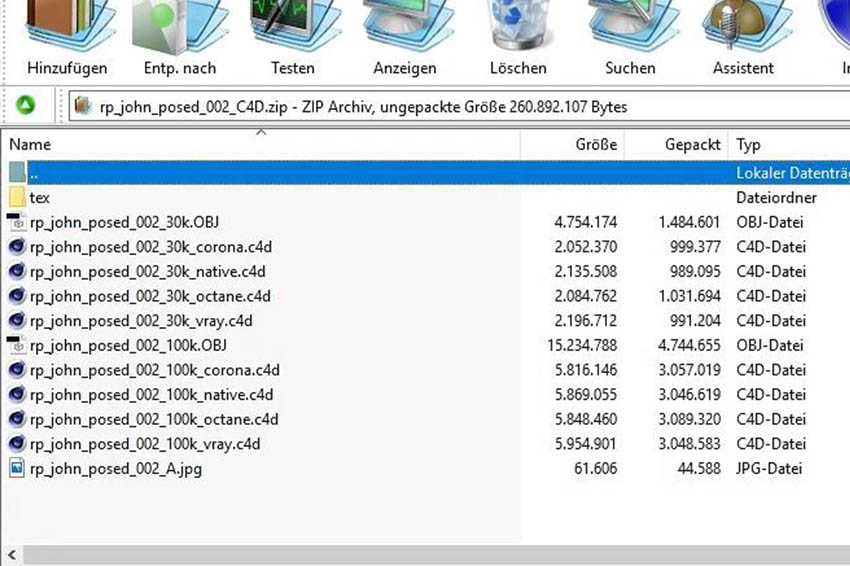
Before you merge the models into the scene it is important to copy some of the needed files into the project folder. The Renderpeople materials were created with relative paths, so the included textures will be linked automatically if the “tex”-folder is placed in the project folder. Copy the “tex”-folder and the Renderpeople-Cinema 4D file into your project folder. It is very important to copy the whole tex-folder, because the material will look for this exact foldername.
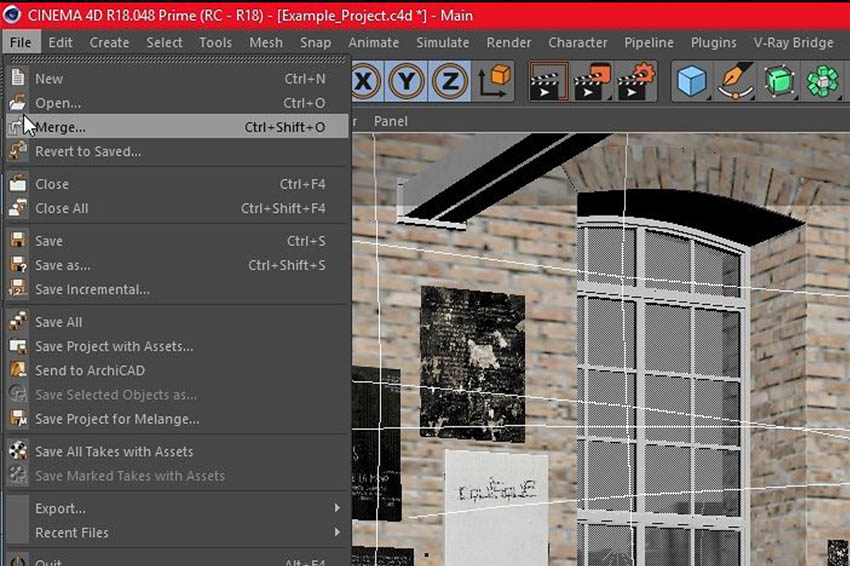
In the top left main menu, use the file-merge option, to import the new model with all needed materials into the scene.
Move and rotate to model until you´re happy with the position.
After you have positioned your model in your scene, you can also edit the material of the model in the material editor.
As you can see, the materials and textures were linked and loaded automatically, because the tex-folder with all textures has been to the project folder.
If you want to import more models, simply repeat the process with another model, but keep in mind that you need to copy all needed files before you merge a different model into your scene.
For more information, check out our tutorial on how to import Renderpeople models into Cinema 4D:
Renderpeople Tutorial – Importing Renderpeople Models into Cinema 4D
You are currently viewing a placeholder content from Default. To access the actual content, click the button below. Please note that doing so will share data with third-party providers.


