Importing 3D People
Importing 3D People
The Renderpeople Studio allows you to easily and quickly import Renderpeople models into your 3D scene. There are multiple methods to import models into your scene.
- Import one model
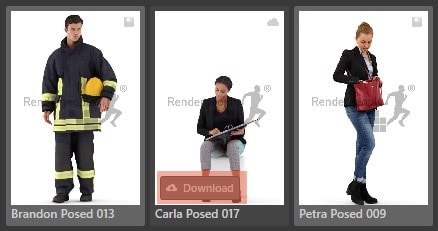
A single model can be imported if it has already been downloaded by hovering over the product tile or row and clicking the Import button. If a model has not yet been downloaded, the Download button will appear instead. If you still want to import this model, you can either download it first and wait for the download being finished, or simply use method 2.
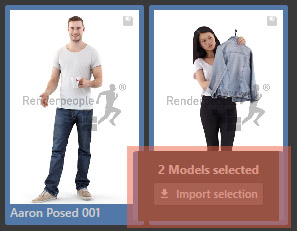
- Import one or multiple models by using the pop-up area
If you select one or more models, a pop-up area will appear in the bottom right corner of the Content Area. Depending on your selection, this pop-up will offer you different actions:- If your selection only contains downloaded models, you can click the Import Selection button to import each of your selected models. This also works if only one model has been selected.
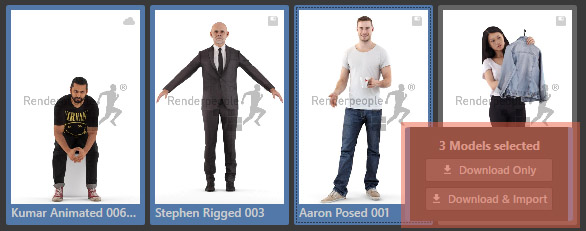
- If your selection also contains Cloud models (more information), you can choose between clicking the Download Only or the Download & Import button. The Download & Import button will download all models in your selection that have not yet been downloaded and then import each model from your selection one by one. This also works if only one model has been selected.
- If your selection only contains downloaded models, you can click the Import Selection button to import each of your selected models. This also works if only one model has been selected.
When a Renderpeople model has been imported, it will be automatically placed in the origin of your 3D scene. Moreover, all textures are being connected with the model’s material. All texture paths will be created as absolute paths to the model’s corresponding subfolder within the set Local File Path.
Import Options
Renderpeople Studio offers multiple options for importing Renderpeople models into your scene. These options can be set within the 3D People Settings tab in the Settings window.
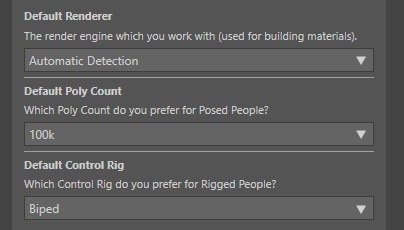
- Default Renderer
Please set this to the Renderer that you are using in 3ds Max. This setting defines, which pre-built materials are being imported when importing Renderpeople models into your scene. The following options are avaiable:- Automatic Detection:
This option automatically detects your active production Renderer when importing a model. - V-Ray
- Corona
- Octane
- Native
This means: 3ds Max Scanline Renderer - No Material (OBJ/FBX):
This Setting will import an OBJ file (for Posed People models) or a FBX file (for Rigged People and Animated People models) without having a specific pre-built material attached to it.
- Automatic Detection:
- Default Poly Count
Please note: This setting is only relevant to Posed People models.
Posed People models are available in two different polygon resolutions: 100k and 30k. By setting this option you define which resolution of the model is being imported by default. - Default Control Rig
Please note: This setting is only relevant to Rigged People models.
Rigged People models are available with two different types of control rig: Biped or C.A.T. By setting this option you define which control rig is being imported by default. If you do not want a control rig to be imported please simply import the FBX file of your Rigged People model by using the Renderer setting No Material (OBJ/FBX).
Ask for settings at each import
If the checkbox for Ask for these settings at each import is enabled, a pop-up window will appear each time, a Renderpeople model is being imported. If this option is disabled, the default settings will be used for every import.
![]() Please note: If multiple models of the same type are being imported (e.g. multiple Posed People models) the pop-up window will only appear once per batch import and appy the same setting to each of the imported models. If multiple models have to be imported with different settings (e.g. 10 Posed People models with 100k polycount and 7 Posed People models with 30k polycount) this has to be done in two separate batches.
Please note: If multiple models of the same type are being imported (e.g. multiple Posed People models) the pop-up window will only appear once per batch import and appy the same setting to each of the imported models. If multiple models have to be imported with different settings (e.g. 10 Posed People models with 100k polycount and 7 Posed People models with 30k polycount) this has to be done in two separate batches.